Monday, July 31, 2006

My Roundabout Tank

Hi Everyone - I am really excited to be in this KAL. All the knitted items are so pretty and everybody seems to have done an amazing job. Right now I am working on the Roundabout Tank. I am using Berroco Glace. I searched high and low for Denim Silk, but I could not find anough in the color I wanted and in the same dye lots. So I decided on Glace, swatched it out and am using size 9 needles. I am loving this pattern so much. It is interesting and fun and moves along very quickly. Here is what I have so far.


There are more details on my blog.

Sunday, July 30, 2006

My First KAL

I'm a surprisingly slow adopter of technology, considering I work in an industry where any kind of internet surfing counts as "desk research" and blogging counts as "professional development".

So this is my first KAL. My (2-month old infantile) blog is here.

I'm still waiting for my Knitting Nature to come in the mail.

At least the weather's still cold enough in Sydney to knit for another couple of months.

Roundabout Leaf Tank sizing question

Hey all!

I just started this pattern and I'm completely new to the KAL...so hello!

My chest is about 39" across at the biggest part, putting me inbetween the size 36 and the size 40. I decided to knit the size 40, because it was closest to my size. I noticed, however, that the size 40 looks WAY too big and am wondering if the idea is that because the garment will stretch downwards, it will be a bit tighter at the top or if i should see about making the tube a bit narrower.

Any help would be greatly appreciated!

Tuesday, July 25, 2006

Shell Tank finished

The latest project I finished from this book is more adapted to the hot summer weather with 35 degrees centigrade here in germany than the Hex Coat I knitted before, it´s the Shell Tank. I knitted it as a present for my cousin so here is again no photo someone wearing the Tank, sorry. I´ll ask her whether she´ll give me a photo for you ;-)
So, here it is:

Photobucket - Video and Image Hosting

The yarn is Schewe Unique 50% Cotton, 50% Polyacryl and is a leftover of a cardigan I knitted in May. I knitted the Tank in size petite and I used 220 gramms by a yardage of 125m/50g.
I enjoyed the knitting very much but I´m lazy so knitted the 3 parts of the front as just one :-) and I can recommend it to you all.

Have fun with your projects.
Claudia.
http://myblog.de/himawari

addendum:

Here is the photo showing my cousin wearing the Shell Tank which has been a present for her.

Photobucket - Video and Image Hosting

You also asked for how I did the front in just one part. I began which the chart and then in the 9th row I cast on the stiches for the right side as given in the pattern and also a few rows further not just the few stiches as given in the pattern but also the number of stiches given for the left side. That´s all :-)

Monday, July 24, 2006

Finished Cabled Spiral Pullover

Here's my Cabled Spiral Pullover finished. I have made some modifications to the body, but the yoke, turtleneck and sleeves are knitted exactly according to the pattern. I had no problems with the instructions or the chart. The yarn, however, wasn't the best choice for cabling. It's cashmere from Pinnsvindesign.

Edited to answer question about waist shaping: I wrote above that I have made "some modifications to the body", but that's an understatement! I have used a basic fitted sweater pattern from 1000 Sweaters by Amanda Griffiths, and knitted it a couple of sizes too small, to achieve negative ease.

I made a few false starts before I found the rights size and gauge, but once I reached the yoke it was smooth sailing. There are more posts in my blog, here, here and here.

Wednesday, July 19, 2006

Basalt Tank Progress

No one left a comment on how to proceed after the Basalt Tank Derailment. So I frogged back to the second eyelet row and continued in stockinette.

There are some more pictures and notes on sizing and construction on my regular blog. I used a different decrease formula than the one in the book in order to get my hexagons to come out flat.

Monday, July 17, 2006

New to this KAL

Hi Everyone - I am new to this KAL. I have not received the book yet....it is on order. But I can not wait to flip through the pages. So far, the first on my list is the Roundabout Tank. Everything about it I love. I am sure there other patterns, withing those pages, that will call to me as well. I am enjoying lurking at this time. All your projects look wonderful. Can't wait to post my own.

Basalt Tank and Target Wave Mittens

I love this book, and have started two of the patterns!

First, the Basalt Tank. There is lots of good information from this knitalong on errors in this pattern, thanks! I'm using Jo Sharp Soho Summer in the Currant colorway. My gauge all around is off from the pattern, so I knit a gauge swatch:


So far so good. I'm planning on adding some waist shaping to the sweater. We'll see how that goes.

I also started the Target Wave mittens. I bought some Louet Topaz for the mittens, so again my gauge is different from the pattern. The pattern measurements seem a bit odd - the child's large is 9 1/4 inches long, and a pair of mittens that I own are the same length. I do believe that my hands are longer than a child's large (they certainly wider). I'll be double-checking that length once I finish the cuff.

Saturday, July 15, 2006

Hex Coat Errata

I just finished the back of the Hex Coat, and I noticed a few minor errors in stitch counts. It wasn't really a big problem, but if you're an obsessive stitch counter like me, it might throw you off a bit.

In the armhole shaping part of the back, the stitch counts given after each round of decreases is off. I don't really know the best way to type this out, so I'll just give the stitch counts as they should be for each size:

Petite: 88 st. -> 58 st. -> 24 st.
Small: 98 st. -> 62 st. -> 24 st.
Medium: 108 -> 66 -> 24
Large: 118 -> 72 -> 26
XLarge: 128 -> 76 -> 26

One thing that may be a bit odd is that the armhole shaping from the front is not the same as the back when you're decreasing 1 stitch on each side. In the front, you do this 2 or 3 times depending on the size, but in the back, you do this 4 or 6 times. If the back decreases were the same, however, the stitch counts given in the pattern after this step would be correct.

I hope this makes sense for you guys. Like I said, it's not a really big deal, but I was a bit thrown off when I had put my knitting down for awhile and then came back to it and counted my stitches to see how far I had made it in the decreases.

Now that I've finished the back, I'm cruising on the sleeves. I can't wait to be finished!

Friday, July 14, 2006

Roundabout Tank

I have started my roundabout tank 2 days ago I love the pattern, it's going super fast! I want to thank you girls for all the corrections that I found in this KAL before we got the errata! It's so much help!
And thank you Norah Gaughan for a very unusual knitting book!


At first I knit one round and joined it, tried it on, too big, too roomy, so I frogged like 6-7 rows and then joined it, I may have some problems further, but hope not when the shaping of the body starts. Also I am using Tahki Cotton Classic, so even if it's a bit roomy washing machine can shrink it up for me for a better snug look =) Judging by the speed I am going, I will be done very soon! No wonder it's such an easy and fun pattern!


Good luck everyone with your Knitting Nature Projects!
Olga

In the Mail!

Hi everyone,
I just join this KAL. A friend told me how great the Knitting Nature book is, and I was completely inspired to get the book by this blog after I saw your photos! It's in the mail from Amazon, can't wait to get started. I have no idea if it's possible or not, but I'd like to try using some larger gauge (e.g., US10) needles/yarn; I'm good at math and changing gauges. Anyone have any advice about this?

Reason being that I have way too much yarn, and trying to control my urges to buy more. But I suppose I could blame a new purchase on my best friend! (She'd love that, she's the one telling me I've got a yarn sickness.)

I'm pretty new to knitting, and I've never had any desire to knit anything with smaller needles or cables/fancier stitches/etc until I saw the sweaters in this book!!! I love mathematical and the organic nature of the designs.

:-) Gelsomina
gelsominalucchesi.blogspot.com

Thursday, July 13, 2006

Errata....

A note from your mod...

I was recently sent this errara to the book. In the next few days I'll add a link in the side bar so that people can acess it easily and comment and help keep it up to date.


Chapter 1 – Hexagons

Basalt Tank

Page 16

Row 7 should read as follows:

Row 7: P1, *p1, yo, p2tog; repeat from * to last st, p1. Redistribute markers, if necessary, so that you have 27 (29, 31, 33, 35) sts between markers.

Page 19

The following changes should be made to the Inside Section:

Rows 1, 3, and 5 (WS): P1, knit to last st, p1.

Row 7: P1, *p1, yo, p2tog; repeat from * to last st, p1. Redistribute markers, if necessary, so that you have 11 sts between markers.

Rows 9, 11, 13, 15, and 17: Purl.

The following change should be made to the 5/6 Hexagon 5:

CO 32 (34, 36, 38, 40) sts, pick up and knit 31 (33, 35, 37, 39) sts along side D of Hexagon 1, and 31 (33, 35, 37, 39) sts along side E of Hexagon 3 , CO 63 (87, 71, 75, 79) sts –157 (167, 177, 187, 197) sts. Work as for Hexagon 4.

The following change should be made to the Full Hexagon 6:

CO 32 (34, 36, 38, 40) sts, pick up and knit 31 (33, 35, 37, 39) sts along side B of Hexagon 2 , pick up and knit 31 (33, 35, 37, 39) sts along side B of Hexagon 4, CO 31 (33, 35, 37, 39) sts, pick up and knit 31 (33, 35, 37, 39) sts along side D of Hexagon 5, and 32 (34, 36, 38, 40) sts along side D of Hexagon 3 – 188 (200, 212, 224, 236) sts. Work as for Hexagon 1.

Page 20

Delete the following sentence:

Sew Hexagons 7 and 6 to 4 and 5 as indicated on diagram.

Row 7 should read as follows:

Row 7: P1, *p1, yo, p2tog; repeat from * to last st, p1. Redistribute markers, if necessary, so that you have 55 (57, 59, 61, 63) sts to the first marker, 27 (29, 31, 33, 35) sts to the second marker, and 55 (57, 59, 61, 63) sts to the end.


Snapping Turtle Skirt

Page 32

Under RIGHT ZIPPER EDGE TRIANGLE

Shape Triangle: (RS) Decrease 2 sts every other row 3 (4, 5, 4, 5, 6, 6, 6, 7) times as follows: Knit to last 4 sts, k1, sssk....

Page 35

Under Shape Hexagon:

Work 2 (1, 2, 1, 2, 1, 2, 1, 2) rnds even. Next rnd, *k2tog; repeat from * around–9 (6, 9, 6, 9, 6, 9, 6, 9) sts remain....

Under Bottom Trim:

With Rev St st side facing and using circ needle, pick up and knit 17 (18, 19, 20, 21, 22, 23, 24, 25) sts along each side of each Row 4 Hexagon, plus one st at each Hexagon point – 210 (222, 234, 246, 258, 270, 282, 294, 306) sts. BO all sts knitwise.


Chapter 2 – Pentagons

Swirled Pentagon Pullover

Page 48

In Schematic for Back and Front, left-hand measurement from cast-on row to final bind off, not including Yoke, should read 16 1/4 (16 3/4, 17, 17 1/4, 17 1/2)".

Page 49

Under Back Neck, after DO NOT JOIN:

Work in 1x1 Rib to last st, end k1. Row 1 (RS): Continuing in 1x1 Rib....


Chapter 3 – Spirals

Nautilus Poncho

Page 72

In the Schematic, total length (on left-hand side of the schematic), should be 128 1/2 ((143 1/2)". Lengths on right-hand side should be 22" and 106 1/2 (121 1/2)".


Shell Tank

Page 86

Under LEFT FRONT:

Using smaller needles, CO 21 (25, 33, 37) sts....

Work even as established for 1”, ending with a WS row. (RS) Change to larger needles and St st, knit 1 row, decrease 1 (0, 3, 2) sts across row - 20 (25, 30, 35) sts remain. Work even for 1", ending with a WS row.

Page 89

Sew right shoulder seam. Neckband: Using smaller needles, beginning at Right Front, pick up and knit 98 (102, 102, 104) sts around neck shaping on Right Front and Back. Knit 1 row. Purl 1 row. Knit 1 row. BO all sts purlwise. Sew Center Front Cable Panel to Right and Left Fronts [see assembly diagram]. Sew left shoulder seam. [Note: The number of sts on the left Front and Back shoulders will differ from each other; however, due to the ribbing at the end of the Center Front Cable Panel, the width will be the same.] Armhole Edging: Using smaller needles, pick up and knit 88 (94, 100, 106) sts around armhole edge. Work as for Neckband. Sew side seams.

Page 90

Row 25, st #15 should be a purl.

The following cable crosses should be as follows: Slip 2 sts to cn, hold to back, k2, p2 from cn: Row 59, st #'s 26-29; Row 61, st #'s 24-27; Row 63, st #'s 22-25; Row 65, st #'s 20-23; Row 67, st #'s 18-21; Row 69, st #'s 16-19; Row 71, st #'s 14-17.

Page 91

Row 141, st# 18 should be a knit.


Ram's Horn Jacket

Page 94

Under LEFT FRONT, Shape Neck:

BO 5 sts at beginning of row every other row once, 4 sts once, 3 sts once, 2 sts 3 times, then 1 st 0 (1, 2, 3, 4) times–20 (22, 23, 25, 26) sts remain,....

Page 95

Under COLLAR:

Row 11: K1, [yo, p2tog] 3 times, k1.

Row 19: K1, [yo, p2tog] 5 times, k1.

Rows 22 and 24: P2, [yo, p2tog] 5 times, p2.


Chapter 4 – Phyllotaxis

Roundabout Leaf Tank

Page 108

Row 1 (RS): K2, yo, ssk, k16, yo, ssk, k2.

Page 110

After Shape Top of Body: (RS) Discontinue working leaves. Decrease 1 st every 14 rows 17 times....

Page 111

Under Establish Pattern:

Row 1 (RS): K3, yo, ssk, k2 (2, 3, 3, 2), [p2, k2] 5 (6, 6, 7, 8) times, k1 (1, 2, 2, 1), yo, ssk, k2.


Chapter 5 – Fractals

Ogee Tunic

Page 128

Under FRONT – Shape Neck:

BO 10 sts at each neck edge once, 3 sts once, 2 sts once, then decrease 1 st at each neck edge every other row 5 times – 19 (22, 25, 28, 31) sts remain for each shoulder....

Page 130

Chart, Row 29, sts 66-69 should be worked as a front cross cable, not a back cross cable.


Chapter 6 – Waves

Turbulence U-Neck Pullover

Page 164

Chart should have Row 36, which is worked as for Row 34.


Moiré Skirt

Page 170

Under GORES, insert the following text:

Note: Refer to chart for decreases only. Skirt is worked entirely in St st.

Delete the note from under FINISHING ON PAGE 171.

Hello from the rather absent Mod...

I just wanted to stop by to say hello. I know I haven't been commenting much, and I've been a bit slow in sending out some of the invites, but I've been trying to keep up with the posts. The first few month or so of summer was very hectic for me, but hopefully things will be getting better.

I'm not sure if this has been posted here, but I thought I'd share this interview with Norah Gaughan which I recently found.

Also, I wanted to let people know that there will be two Norah Gaughan patterns in the Fall 2006 issue of Interweave Knits. The patterns are the Supernova Pullover, which looks a lot like the Swirled Pentagon Pullover, and the Target Wave Mittens, which is included in the book. People should feel free to post about these patterns too (as well as any other pattern of hers).


----------------------------------

As for my own knitting, just like nearly everyone else, I'm working on the Roundabout Leaf Tank. But, unlike everybody else, I haven't made much progress. I just recently joined the strip for the first time and I'm considering doing some shaping on the sides. I've got a relatively small waist for my size (that's the nice way of saying that I've got big hips), so I'd like to do something to draw it in a bit around the waist.

To accomplish this I'm thinking about adding a few short rows on some of the strips near the sides (the area that would be the seams on a standard garment construction). I'm thinking of adding some near the bottom on the second strip, then near the top on the higher up strips (to increase again for the bust). I'm not sure if I'm explaining this properly, but I'm hoping it will work. I'll certainly be putting in a lifeline before so that I can easily rip back if need be.

Tuesday, July 11, 2006

Another Sunflower Tam

I just finished the Sunflower Tam, which I cast on for last night after seeing Monika's -- I just had to have one, too!

I used 1 skein of Manos in color #114, knit on size 8 needles. The pattern was intriguing to knit and very cleverly done, with the top shaping completely hidden by the swirls. I didn't find any mistakes, although I kept forgeting to decrease every few repeats and ended up with too many stitches a few times, but that was from not paying attention.

Mine came out more of a skull cap than a tam, due to two things: my gauge was a little tight, and I have a HUGE head and LOTS of hair. This shape is actually more flattering on me anyway, so I don't mind. Other than the size, the only other modification I made is knitting the i-cord at the top to be about 3" long and tying it into a short knot, I didn't like the little tail shown in the picture.

I am really happy with how this came out. I was worried that the multicolor might fight with the swirls, but in the end I think they complement eachother very well. If you're looking to make this and want to use Manos, one skein is more than enough but it might not be if yours comes out bigger. I had a good amount of yarn leftover, but my hat is smaller than it was supposed to be due to the gauge.

I think it'll get a lot of wear in the winter. At the moment though, even wearing it for 10 minutes to get a decent shot of it was torture -- it's so humid in NYC, you'd think it was the Amazon!

Monday, July 10, 2006

Sunflower Tam

My first finished project from the book is this Sunflower Tam. More specifics on my blog .
Love this pattern!
Monika

Hex Coat - Finally done :-)

I think this is the project I finished fastest of all. It took me 17 days in the evenings while watching TV and a few hours more on weekends. With 5mm needles it grows as fast as I can´t imagine except the back that I thought would never end ;-)

So, here it is:

Photobucket - Video and Image Hosting

Sorry, but there is no photo me wearing the coat because of having temperatures near 30°C here in germany...

I used a Lopi yarn from a different distributor than recommended in the book and I spent 815 gramms knitting the pattern in size small. All specification fits and there has been no mistake in the pattern as others metioned for some patterns in this book. The only thing I diverged from was using 4,5mm needles for the ribbing instead of 4mm. This was a good decission because of having a hexagon with nearly same side lenght on the botton edges.

Wish you all many fun with knitting the Hex Coat too.

Claudia.
_______________________
www.myblog.de/himawari

Saturday, July 08, 2006

Basalt Tank Derailed


I started the Basalt tank yesterday using stash yarns in Amish colors. I encountered several difficulties. These are the two hexagons I had intended to use for my center front and back.

I made the hexagons in the round. For the first hexagon, I used green yarn and the corrections posted by cmeknit but the hexagon puckered in the middle in an unattractive way. So I frogged it back to row 24 and made both garter stitch/eyelet sections the exact same way. I was happy with the result until I got to the inside stockinette section. The decreases were too frequent and caused puckering in the center.

I had previously made two other sweaters with equilateral triangles, but the decreases came at the rate of 6 stitches over 8 rows. Click here for a discussion about the correct decrease ratio for equilateral triangles. Click here for another discussion about the correct decrease ratio for right triangles.

Since I was knitting in the round, I placed paired decreases every 3rd row (6 decreases every 9 rows). The resultant green hexagon has a slight volcano which is barely noticeable. The hexagons in the photograph have not been blocked (just patted down a little bit for their photo op).

So, if I used 2 colors of the same yarn, Cascade Key Largo, then why do I have a small amount of the green yarn left over after completing the hexagon but ran out of the red yarn with 7 stitches remaining on each side?! If you read the label, they both are supposed to be 110 yards.


So I am at a crossroads. What should I do?


  1. Join a ball of dark berry colored yarn and pretend I planned a contrast section all along.

  2. Bind off and leave a peekaboo section in my midsection.

  3. Frog the whole thing and use it as a side 5/6 hexagon. (But this would put the red right next to the green and make a summer sweater look like Christmas.)

  4. Frog back to just after the second eyelet row and continue in stockinette until I run out of yarn. Stockinette would take less yarn than garter stitch and I might have enough yarn to knit the center completely in stockinette (or leave a smaller peekaboo section).

  5. Some other solution from the wisdom of the internet.

Addendum for knitting these hexagons in the round

The pattern was probably written for knitting back and forth to avoid the jog at the end of the rounds. See the mismatch at the change of rounds when switching from garter to stockinette?


Here is what happens when I remembered to knit the first stitch of the round together with the stitch immediately underneath it. The garter purl ridge is lifted up just enough to meet the ridge at the end of the prior row. No jog!


Pay no attention to the pink yarn. I was trying to avoid lumpy seams by using this nifty trick in Lucy Neatby's latest newsletter for crocheting a provisional cast on.

Thursday, July 06, 2006

FO: Turbulence Pullover


Pattern: Turbulence U-Neck Pullover
Yarn: Debblie Bliss cashmerino dk
Needles: Addi turbos 3.5 mm & 4 mm
Gauge: 22 sts and 30 rows = 4 inches
Modifications: None
Size: Petite
Started: 6.14.06
Completed: 7.4.06

This pullover was a straightforward knit – make a front, back, two sleeves, submerge block and then sew, sew, sew. The front piece with the gorgeous cable was the most interesting part of the project, but it went by too quickly. I stuck to the pattern, but if I had to knit it again, I’d consider knitting it in the round and adding waist shaping. It’s big on me and very square/boxy – my own fault, I should have taken the time and adjusted the pattern knowing that the measurements given for the petite size were going to be too big.

The turbulence cable chart is missing row 36 – no big deal, just follow the established pattern – then the next row will be a knit row and you decrease 4 sts between markers (Christine gives details in the comments of this entry).

More on this finished object here.

Brooke

Ram's Horn Sweater

Hi. I bought the Knitting Nature book just last week while traveling and then picked up a beautiful pale green Misti alpaca and started swatching. I decided to start with the collar for swatching purposes b/c it intrigued me and found several small errors in the directions. I think the errors are fairly obvious and easy to correct, but here they are if anyone's interested:

Rows 11 and 19: should end in K1, not P1

Rows 22 and 25: should read Rows 22 and 24

If these have already been posted, I apologize. I haven't had a chance to go back and read everyone's posts.

Here is a photograph of my "swatch" so you can see the color.


Tuesday, July 04, 2006

Ready!!

My Phyllo Yoked Pullover is ready. Look here:

Photobucket - Video and Image Hosting

I´m very happy about this project and I think about the next one. The Hex Coat is beautiful but the weather in germany is to hot to knit it. After making the photo I changed to my t-shirt. When I make a decision I report it. In the meantime I order the coloursample of the Lopiyarn.
Greetings from germany and sorry for my mistakes www.wollball.de

Monday, July 03, 2006

Hex Coat progress


I am making progress on the Hex Coat from Knitting Nature! I was in a knitting rut there for a little bit - between finishing Clapotis and receiving my backordered yarn for the Hex Coat. It finally arrived and I have plunged fingers first into this beautiful pattern. On my screen, the color in the top picture is practically true.


The moss stitch creates such a yummy texture in this yarn. I love it!

Risa

Sunday, July 02, 2006

Vacation update

Hi - I don't have any pictures but have finished the child's size Sunflower Tam and have started one for me (same diameter, but it will be deeper, both in ribbing and in decreases). I've also been working on the RLT a bit, but the cone is slowing me down as I visit about town.

Everyone's work is very impressive. I think I'll devote tomorrow's knitting to the tank, as a (re)motivator. It is a fun pattern.

Saturday, July 01, 2006

Translating a Pattern for Knitting in the Round

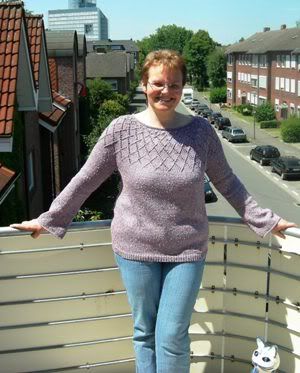
tcknit asked how I translated the instructions for the swirled pentagon pullover for knitting in the round. There are many sources on the web, but here is how I did it.

[This post is also on my regular blog. At that site, you will also find a long discussion about sizing knitted pentagons for your gauge and your yarn.]

Usually, one would leave out the seam stitches when knitting in the round. But I left them in because, in my gauge and with my body dimensions, I needed the extra room the seam stitches would provide.

My gauge was 17 sts/4 in instead of 18. I wanted to make a 40" circumference sweater so I needed about 170 stitches all around. I used the instructions for the petite size, 82+82 = 164 stitches, which should make a sweater that was 39". I cast on 164 stitches, worked the 1x1 rib for an inch, and then switched to stockinette, adding some waist shaping along the way.

I knew that I wanted my sleeve to be slightly wider than 12", so I used the instructions for the size small (40") sweater. I hoped that I could ease the excess stitches into the stretchy yoke without any dimples.

Choosing to work with the written instructions was more than laziness. I could have customized the stitch count more to get exactly the right size. But I am fallible and know from prior experience that I can get the stitch count confused at the armhole shaping. Working with the written pattern stitch count gave me a safety net in case I lost track.

So I knit the sleeves and body pretty much exactly the way it was written, (except for waist shaping). I placed my underarm increases 2 stitches on either side of the join. I placed my waist shaping darts 20 stitches on either side of the center front and back. I used markers for the center front and back, sides and waist darts for the body and at the join for the sleeve.

When I got to the underarm shaping area, I bound off 3 stitches on either side of the sleeve join and the body's "side seams". Then I joined all 3 pieces and placed markers where the seams would have been (round 1). Then I knitted one row even which is equivalent to BO 3 at the beginning of the next 2 rows.

Where it said BO 2 at the beginning of the next 2 rows, I decreased one stitch at each end of the section.

2 stitches from each "seam", I made decorative decreases, pairing the S1, K1, PSSO decrease and the KSP decrease described here.

On round 9, I divided for the center front and back Vs and knitted back and forth. Something I did not do, but should have done, was put the body join at a center front or back. That will make the conversion to the round easier. I placed the join at a side seam and the body and the sleeve row counts were offset by one for a little while. Not easy to keep track of.

I bound off the stitches at the top of the sleeve cap and the yoke as described in the pattern. I avoided the stair step by slipping the first stitch as described here (and in many other places).

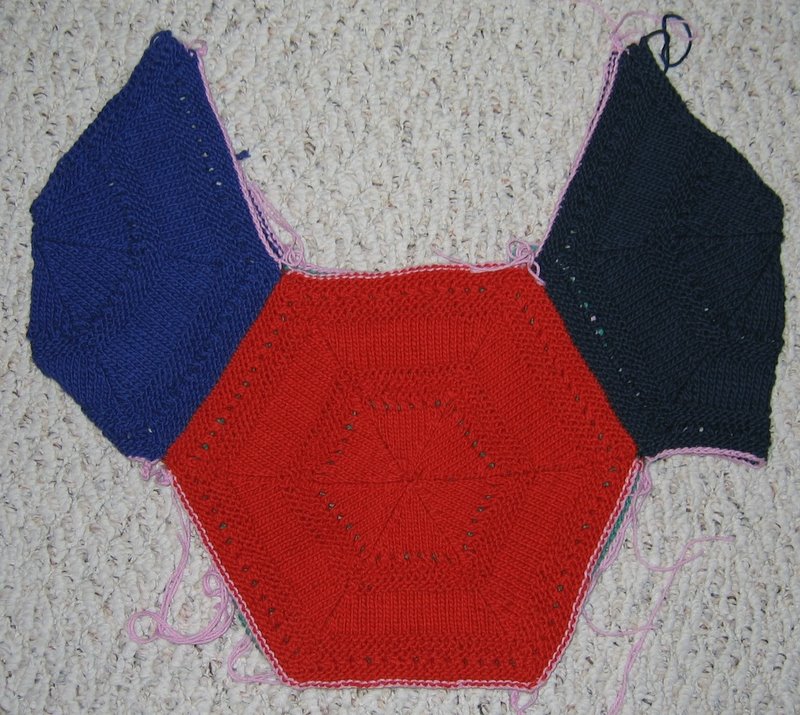
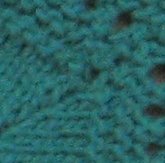
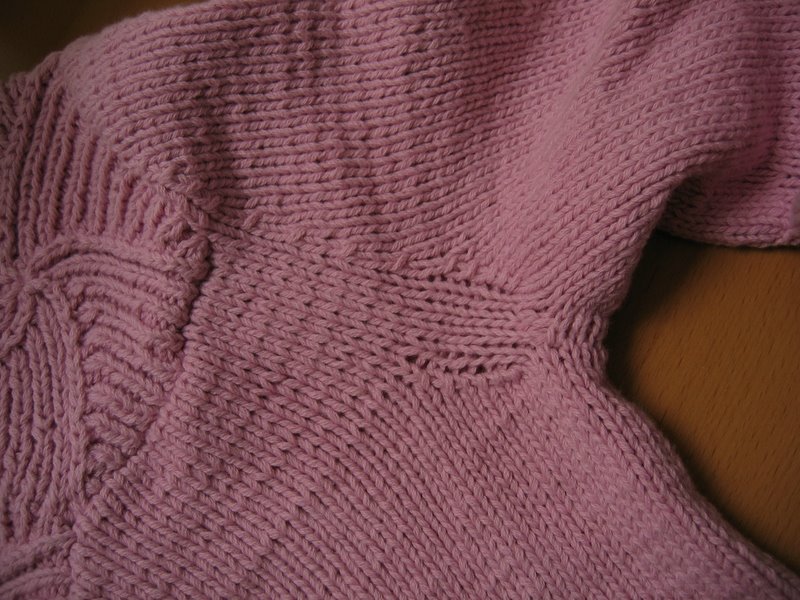
Here is the armpit area of the sweater after I sewed the bound off edges together.


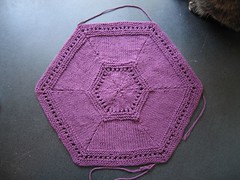
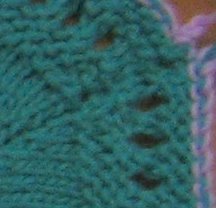
A view of the decorative decreases. It might have looked better if I made the decreases only 1 stitch in from the "seams". Oh, well.


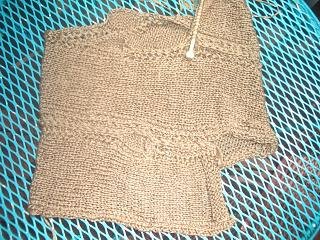
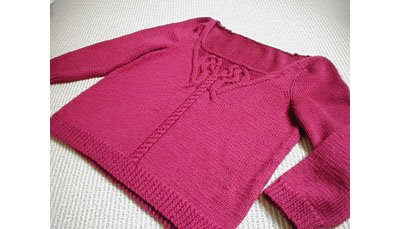
I used only one strand of the pink yarn when sewing the yoke to the sweater. Notice how the sweater is "rowed out" at the top? It is more obvious from the inside.

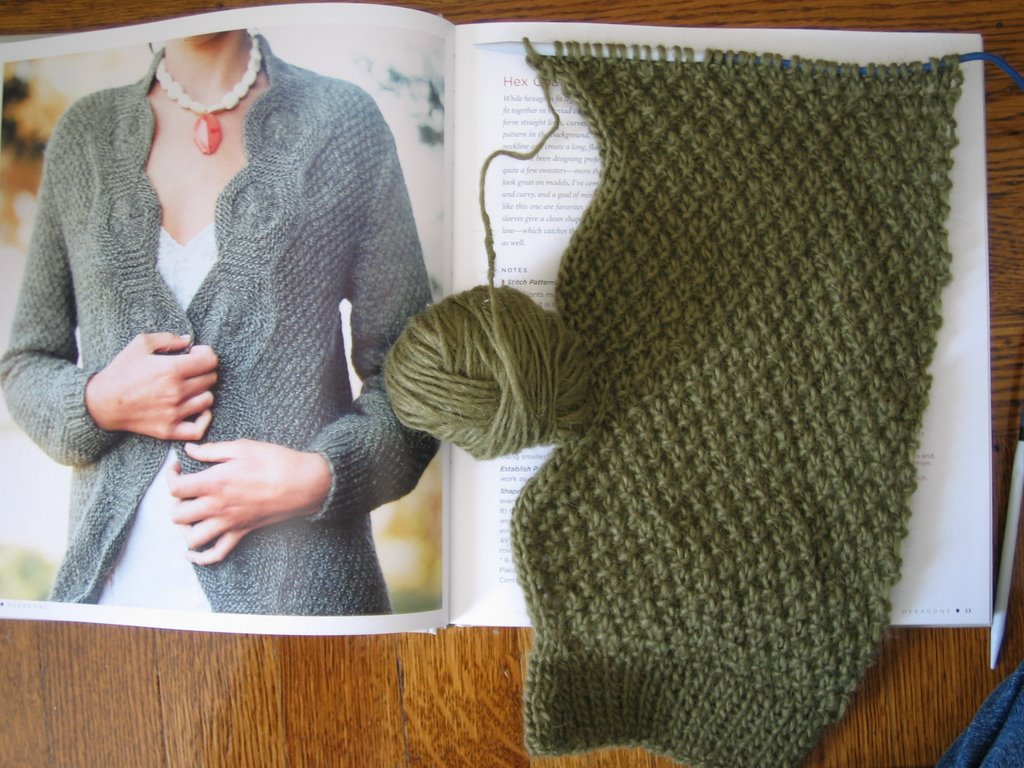
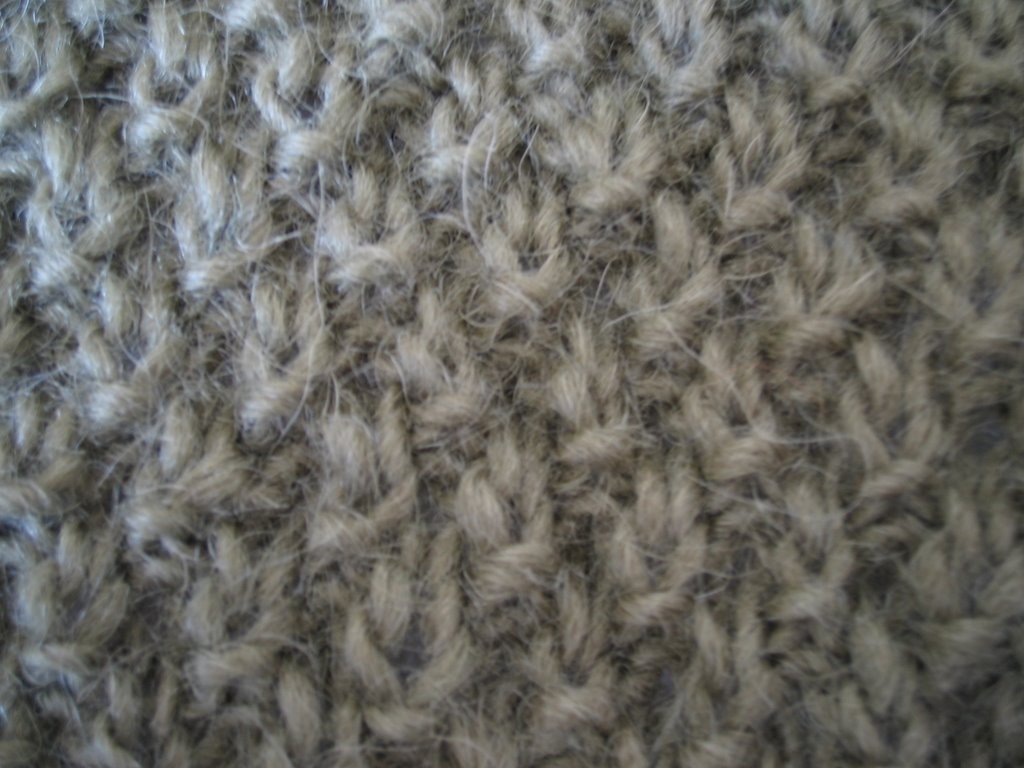
That's why I knit the sweater in the round. When knitting back and forth with inelastic cotton yarn, I simply cannot make my rows even. The sample above was knit using combined knitting. With normal western purling, the difference would have been even greater.

Hope this long post doesn't bore too many people. That's why I didn't also post the instructions for sizing knitted pentagons here.